Monday, February 25, 2013

What I've been up to lately

I spent the early part of last week reorganizing all of my fabric and notions (that was no small feat!) I purged, then sorted and refolded every piece of fabric I own.  I came across a piece of fabric that was just the right size for a roman blind for the downstairs bedroom.  I made it using the guts from a commercial mini blind.  There are many tutorials out there, but I found this one quite helpful.


This old dresser has been used in many places over the years.  I believe it was in Nolan's room when he was a baby.  It was in our baby's room and now it houses my thread and pantos.  Nolan helped me add a removable ironing surface to the top.  Birch plywood, batting and 1/2m of fabric leftover from a kit somewhere along the way.  I am really enjoying this latest recycling project.  


  I also completed the last block in the Curve it Up Quilt Along - the Dresden Plate.


Here is the first block in the the Bullas Bears Block of the Month Quilt. It is called "Joy Bearer". There is a little more embellishing that will happen after quilting.  Snowflake buttons and some shading on the bear's cheeks and muzzle.  This pattern is found in the Quilt Pattern Magazine.  It is designed by Nan Baker, and is based on the artwork of Will Bullas.


And the basement... we have decided to hold off on the flooring in the studio until the rest of the basement is ready for flooring.  This weekend consisted of some paneling removal.  Remove the paneling and what do we find?  The chimney clean out for the living room fireplace!  Even though we don't have intentions of using the wood burning fireplace, I think we will leave it accessible!


And the framing and drywalling of the bulk head.


I was enlisted to assist with the drywall.  (I do help occasionally.)


 Apparently I seemed a little weak and shaky, so for the second sheet I was replaced....


My job became just getting the T into place.

  All in all, not a bad week!


Sunday, February 17, 2013

Weekend Progress


Here is the latest in the Curve It Up series of blocks - fans. When I first read through the instructions I was a little worried that this one might be difficult, but it went together quite easily.  


We had a great weekend.  More forward progress in the basement and a nice evening out at a local fundraising gala with some friends.  We started with the flooring in the bedroom.  Turns out that the best thing to cut the underlay was a rotary cutter!


This was where we had to leave things Saturday so we had time to get ready for the party.  Close, but not quite!


And here is the bedroom tonight.  Baseboard up and ready for furniture.


And we solved one more issue.  See the eyesore of an electrical panel that lives in my studio?  How about this old bulletin board that was just a little too good to make it from the office to the dump?


 Give it a little tweak and add some snow dyed fabric that was lying around and this is the result.  I am thrilled with my new art/bulletin board/door combo!


Wednesday, February 13, 2013

Fat Quarter Place Mat Tutorial

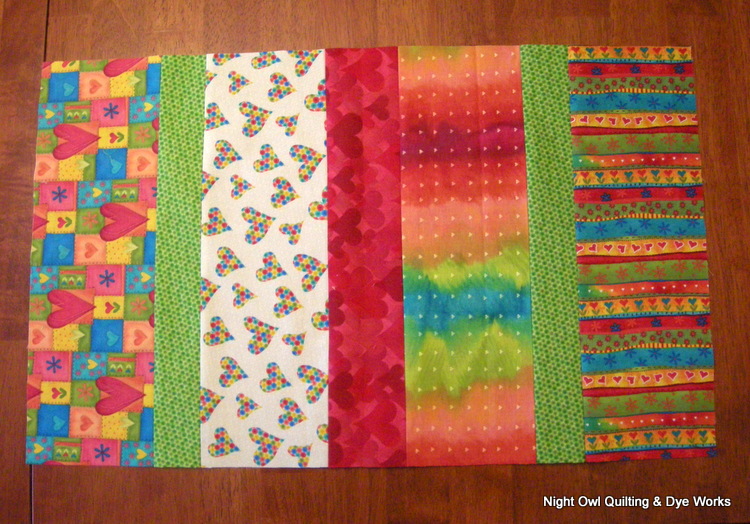
With Valentine's Day upon us I thought I would dress up my table with a new table runner and place mats.  I had these six coordinating fat quarters.


  I was able to make six place mats and this runner.  (All I added was yardage for backing and binding.)


I thought I would share my instructions, because sometimes I am happy to just follow along after someone else has done the figuring out for me.  These go together really quickly and would make a great gift.

From each of the fat quarters cut a 12 1/2" x 20" rectangle.  (Save the remaining strip for the table runner.)


Arrange them in a pleasing order with good contrast between the colors.


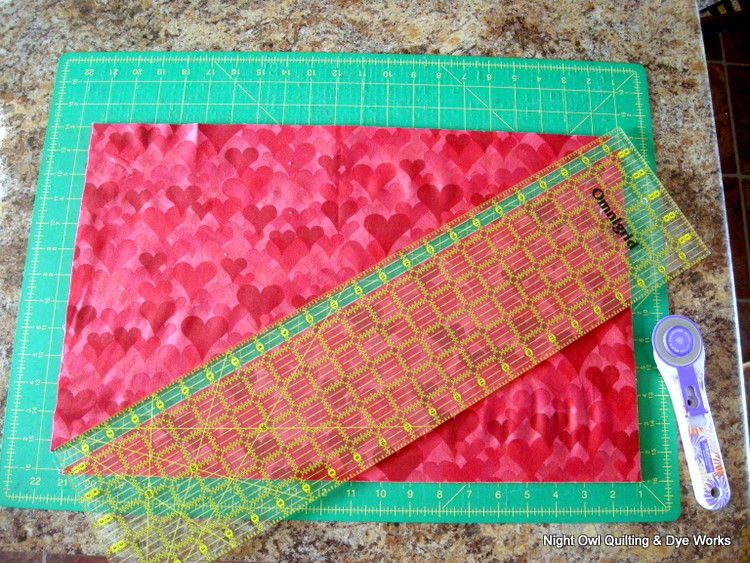
And stack them together all with the right side up. (If you have directional prints, make sure they are facing the same way.  I forgot to double check mine!)


Make your first cut through all layers on the diagonal.


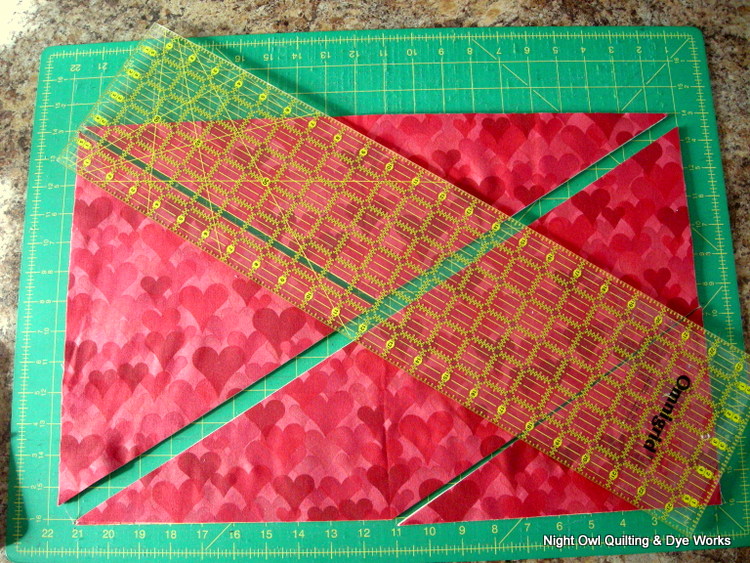
Make the second cut parallel to your first, 5 1/4" down to the lower right corner.


The long diagonal should measure approximately 23 3/4".  Mark the center point of the upper left piece at 11 7/8".  Make your third cut from the corner to your mark.


Cut parallel to your last cut, 4 1/2" on each side.


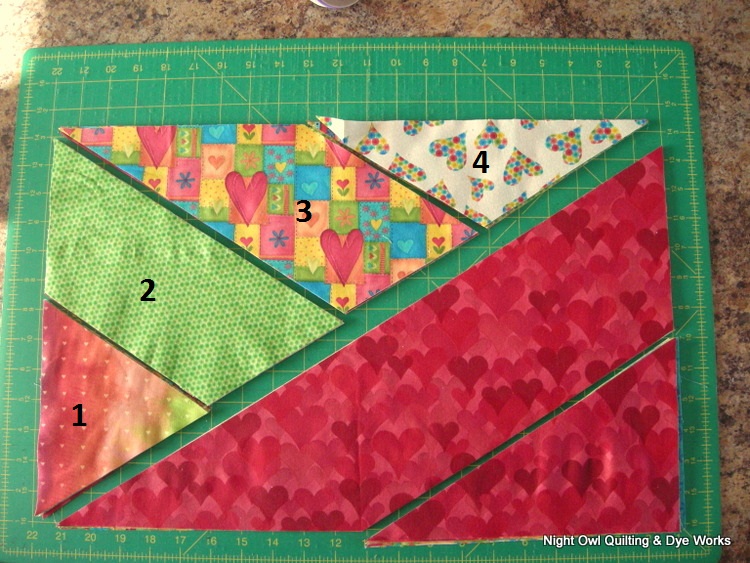
To rearrange your fabric so all the place mats contain one piece of each fabric take one piece of fabric from the pile labelled "1" and move it to the bottom of the stack.


Move 2 pieces to the bottom of pile two, 3 pieces to the bottom of pile three etc.


Because seam allowances have not been included, your place mats are going to be a little wonky when first put together, but they will be trimmed up in the end.  (Here you can really see that the fabric with the white background was upside down when I stacked my fabrics.)


Pin pieces in pairs, being sure to have to 1/4" tail sticking out as shown in the yellow circles.  This will allow the right hand side and the long diagonal to have straight edges.  You are working with bias edges, so be careful not to stretch them out of shape as you sew and press.


Finally join the long diagonal seam.  Have the 1/4" extend at the top right hand corner.  The bottom left hand corner will not match up at this point.


Trim place mat to 11" x 17 1/2".


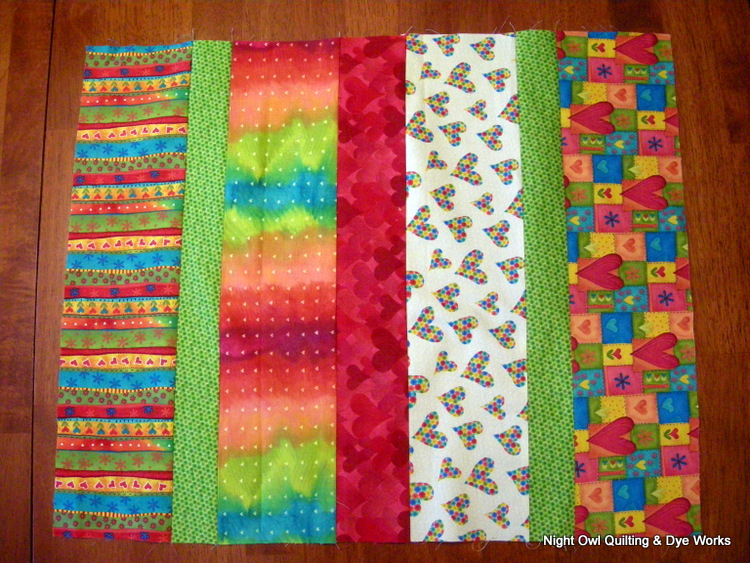
Trim the leftover fat quarter strips to 5" if you have a larger table or varying widths to fit your table.  I used from left to right:

5",  2 1/4",  5", 3 1/4",  5", 2 1/4"  5"


Sew your strips together.

 Trim to a size that fits nicely on your table, for me that is about 15" x 25".

Quilt and bind with your favorite methods.  I decided to take this opportunity to test out some different quilting designs and decided to quilt each one differently.  I was a great exercise to see what I would like to do on a larger piece.


I was very pleased with what I got out of my very small fat quarter collection!


Here is a link to a pdf copy of the above tutorial: PDF Download