Wednesday, May 30, 2018

Feather Bed


This beauty was made by my friend Dawn.  The pattern is called Feather Bed and is available for free from the designer Anna Marie Horner here.


 So much love was put into this piecing of this quilt, that it only needed me to let its beauty shine. I stitched in the ditch between all the feather segments and 1/4" around the outside of the feathers themselves.  The background fill I’m calling “bark”, and I love the texture it gave to the background.


No more words from me, just enjoy a few more pictures of this lovely quilt!


Monday, May 28, 2018

Music Quilt


June made this quilt for her granddaughter's upcoming graduation.  


June prefers lighter quilting, and the fabric is the real star of this quilt, so we opted for the Fascination panto for the quilting on this one.


I have to say that June's choice of backing fabric caught me by surprise.  I would never have considered using this keyboard print for more than a border, but I love the look after it was all quilted.  We should all step out of our box and take a chance now and again!


Sunday, May 27, 2018

Sherry's Leaf Row Quilt Revisited


Do you remember this stunning quilt that I completed for Sherry back in December?  (You can check out all the photos of it here.)  Well it came back for another visit in my studio.....


Sherry was not happy with the proportions of the quilt once she laid it on a bed, and wanted to add some width to the quilt.  Hmm, make a quilt bigger, once it has been quilted and trimmed?  How would that be accomplished?  The first idea (that would have been super easy for me and a bit more challenging for Sherry to make inconspicuous) was for me to quilt up two border panels and have Sherry join them using one of the "quilt in sections joining methods."  Because the rest of the quilt wasn't constructed that way, it may have seemed a bit out of place.

This is the method we chose after Sherry made some test samples.  The backing fabric was cut about 3" wider than the the final quilt measurement, the batting about 1 1/2" wider, and the top layer to the exact finished width.  Sherry basted the backing fabric on first (Right sides together), then put the top layer in place and sewed through all the layers.  The batting was then butted up to the edge and zig-zagged in place.  Sherry was very careful to measure carefully every step of the way, and pressed everything carefully once it was assembled.  


I was then able to load the quilt lengthwise on my frame, and the quilt it just as I would have originally.  We decided that a bead board look would frame the original panto nicely.  I did stitch a line 1/2" away from the joining seam to keep a nice clean line on the back and not have all the beard board lines starting and ending right at the join.


Friday, May 25, 2018

Stash Busting Lug Nuts


This is Grace's rendition of our Highway 10 Designs Lug Nuts pattern.  I taught a workshop on the pattern in January to the Roblin Jewel Quilters and Grace was in the class.


Lug Nuts uses nine one yard cuts of fabric, usually three light, three medium and three dark.  Grace was able to pull all of the fabrics for this quilt out of her stash!  Grace was wise buying yards of fabric not just a fat quarters when something caught her eye.  She fondly remembered where she picked up many fabrics during her travels over the past 20 years.


Grace chose one of my Northcott Stonehenge wide backs, Quilter's Dream Blend batting and the Fascination panto.


Lug Nuts is available as an instant PDF download or traditional paper pattern in our Etsy store, or ask your favorite quilt store about our patterns.


Thursday, May 24, 2018

Radio Silence Lifted


It has been more than 5 weeks since I found time to sit down and post something to this blog!  I am finally back to my more normal routine after a month filled with many wonderful things - being one of the costume moms for the school musical, directing the Parkland women's choir in our year end  concert, a couple of birthdays, a recital, some company, my day job, a couple of trips out of town and some other things I know I have forgotten!  I did manage to do some quilting in there too, and I have some lovely client quilts to share with you, but for today I will share some little projects that got done.  

My couch was in dire need of new pillow covers so I used some left over jellyroll pieces to make four covers with a braid design..  I kind of made it up as I went along.  Quilted the fronts on one nice long piece of backing.


I added a simple envelope backing and  bound the edges as I am really liking the crispness of that look.


Daughter#2 and I worked together to make this Log Cabin Cross Mug Rug/Wall Hanging as a baptism gift for a friend of hers..  I purchased the Patchsmith Pattern on Craftsy.  It cost less than $3 Canadian and someone else did all the math and planning! I printed off the paper piecing templates and we were off the races.  Kendra picked up paper piecing very quickly and this little project was the perfect way to learn something new.


I popped this tiny piece on the longarm for the quilting, and Kendra added her personalization to the back,


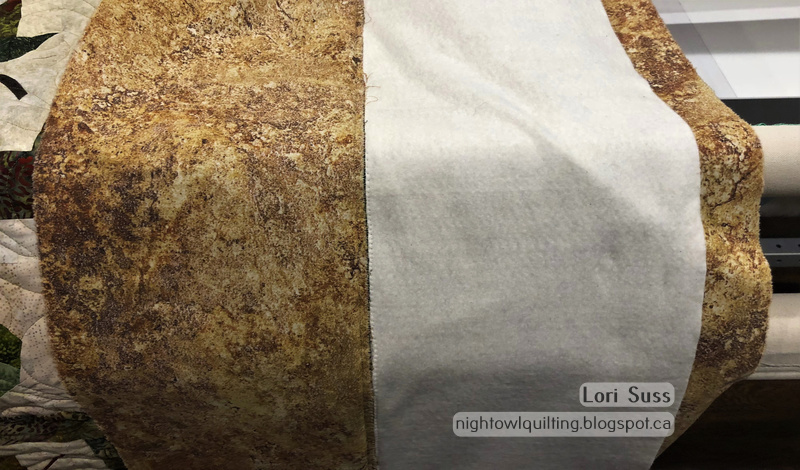
I also had the pleasure of quilting two of the eight quilts that the Nimble Thimbles quilt group in Gilbert Plains, MB sent to Humboldt, to respond to the call for Quilts for Broncos after the tragic bus accident involving their hockey team.


  I was able to load both quilts on one backing .


I used two different free motion designs, as I enjoy that but don't do it all that often.  This gold bordered one got the topographical map line design and the green bordered one got curly 3's and e's.