

I am happy to say I have totally completed my Alpine Wonder quilt. Binding and 12 dozen crystal added the final touches. The original pattern had many more crystals, including amber colored ones on the tree, but I decided to leave the tree natural so that I could enjoy this hanging during the winter, not only the holiday season.


The pattern had very little detail about how to attach the multi-colored gradient binding. I love the effect that the end product has, but getting there took a little head scratching.

I pieced four binding strips together as shown above. I knew that I wanted the light parts of the fabric to be in the centers of the sides and that the green and blue should change where the snow met the sky.

I decided to use a non typical method of attaching the binding where you join the strips at the four corners. Believe it or not, this "stitched mitered corner binding" was this first binding method I was taught, and although it is not my go to method of choice it does come in handy every now and again.


Sew the strips to each side of the quilt, stopping a 1/4" from the corner, and leaving about a 3' tail on each side. (With this method I could match the binding seam between the blue and green to the snow/sky line.)

I now own this cool tool to help with the next part of the process, but it can be done with a regular ruler, or another binding miter tool.

In order to mark your sewing line on the binding, you need to fold your quilt in half on the diagonal (right side together) and pin the edges of the binding strips together. I was able to use my Corner Mark-it tool to quickly mark my line after lining up the guides on the ruler.

If you do not have a special tool you can mark your sewing line as shown above by doing the following:
1.
Mark
a line perpendicular to to the edge of the binding at the end of the stitching line. Shown in red.
2. Mark
a 45 degree line from the end of the stitching to the fold of the binding. Shown in yellow.
3. Mark
a 45 degree line from the point of intersection of the perpendicular line and
the folded edge of the binding to the raw edge of the binding. Shown in green.
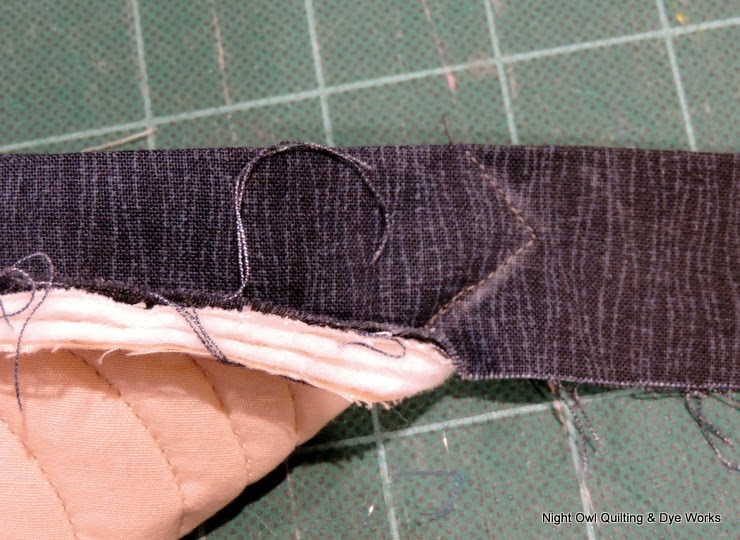
This is what your stitching line will look like. Be sure to shorten your stitch length and use a matching thread.

Trim close to your sewing. I usually do a test to make sure that everything is lying nicely before doing my final trim.


Turn your binding to the back of the quilt. You can see here that the miter has formed on both the front and the back. All that remains is to stitch the edge of the binding to the back of the quilt. No corners to manipulate.

I love seeing how this one changed from a simple unfinished top to something I am really excited to keep at my house!


What a *great* job you did! I have long admired this pattern and you have brought it to life! I like your idea of not putting the holiday colored crystals on, so you can enjoy the wall-hanging all year long.
ReplyDeleteWow, extremely lovely. I had never seen binding done that way...what a great answer to this design.
ReplyDeleteIt really turned out gorgeous! Enjoy it as I'm sure you will.
ReplyDelete