Sunday, July 13, 2014

Sweet Dreams


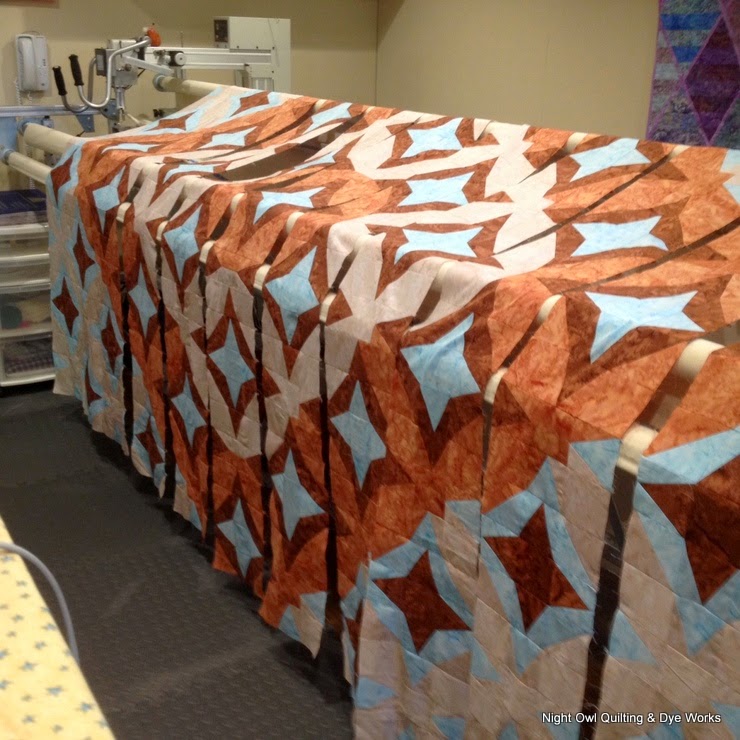
This is Vanda's "Sweet Dreams" Quilt.  The pattern came from a recent issue of Quilter's World Magazine. I love the fresh modern color palette that she used, and I am sure the young graduate who will be receiving this quilt will too.
 

We decided on the "Fascination" pantograh, white Magnifico thread and Quilter's Dream Puff batting.


 And since it is summer, it is once again time for our family tradition of the girls taking on the planning/cooking/cleaning up of supper one night a week.  Kendra had the first week on her own while Kyla was at camp and made a Chow Mien Casserole and salad but I forgot to snap a picture before we dug in. This week we were treated to steak, baked potatoes, green beans and our first picking of garden lettuce. This tradition is by far one of my best parenting moves ever!


Thursday, July 10, 2014

Paper copies, progress and a recipe

It was a great mail day here yesterday as the paper copies of "Quarters Sections" arrived from the printer.  They are available in the Etsy Store or if you are close by,  just give me a call.


 I also made a little more progress on the "Yellowstone" inspired quilt top.  Reached the halfway point, which is always exciting!


And every once in a while I like to share an interesting recipe that I come across.  I have tried this one about 3 times now, and it was a big hit with the whole family.  Nothing healthy about it, but it was a real treat and super easy to do.  The recipe for this One Pan Easy Fettuccine Alfredo can be found on the No. 2 Pencil website.  Thanks Melissa it was delicious!


Wednesday, July 2, 2014

This and That


Summer is here and things are as busy as ever.  I did find a little bit of time to work on my quilt top with my "Yellowstone inspired" fabrics.  All the blocks are in rows and I have 4 rows together. It is kind of a slow process as there are a lot of points to match, but I am happy with the results so far.  
Two bloggers that I follow - Michelle at mmm quilts and Vicki at Field Trips in Fibre both mentioned a tool a couple of weeks ago that I hadn't tried.  They both use a seam stick (a 1/2 round piece of hardwood) to help press seams open.  Since I need to press the long seams open between the rows of this quilt I wanted to give it a try.  I asked my hubby if he had something that would work - enter the broken handle from one of our homemade paddles.  (Good thing he hates to throw anything away!)


I have to say I was impressed.  The seams fall open much more easily when placed over the seam stick.  You can buy them commercially, but you can beat the deal I got on mine!


We really enjoyed being at home for Canada Day yesterday.  Here is a picture of Nolan chauffeuring Safety Bear in our local Agricultural Fair Parade that took place on the weekend.


 And here is part of yesterday evening.  I needed some quilted fabric for a boot bag I am making for Nolan, so I loaded the machine and a panto and had my two helpers give it a go.   They were not impressed with their results, but I think they did okay.  It was fun to have some company in the studio.


Sunday, June 22, 2014

Baby Girl Quarter Sections


 I was invited to a baby shower for a cousin of mine and needed a quick quilt for the new baby girl as I didn't have a lot of time to get it in the mail.  Quarter Sections to the rescue!    My girls helped me pick out the 5 fat quarters and border fabric at Fabriculous in Swan River.


We decided on cuddle fabric for the back, which isn't my usual choice, but it does show off the quilting really nicely.  The panto I put on this one is called "Heart Strings."


And before it was time for it to get in the mail I couldn't resist a photo with our original baby boy version of the pattern. 


The Quarter Sections pattern is available in our Etsy shop or Craftsy shop.  

Friday, June 20, 2014

Oriental Sampler & My method for the last row of a panto


This lovely sampler quilt belongs to Vanda.  She loves Oriental fabrics and it was neat to see a sampler pieced from them instead of the more typical traditional fabrics.


We used a dark gold Magnifico thread and one of my newer pantos called "Breath of the gods".  It gave a really nice texture to the quilt.


I had a bit of an "Aha!" moment when doing my last couple of pantos.  I am going to share my process for the last row of a panto as I have a system down that really works for me.

When I am ready to advance the quilt, I place a camp behind my front wheel to mark a spot on the partial row on the bottom of the panto.  (The read dot is a little faint, but I think you can see it.)


I then advance the quilt and place the needle directly above the same spot on the panto.


Now to figure out how far I need to stitch to cover the end of the quilt.  It is never a full row.  I go to the front of the machine, and stitch down the edges of the quilt.  I then place the needle about 1" past the bottom edge of the quilt.


I then go the the back of the machine and place a clamp in front of my front wheel.  I now have given myself a boundary to not pass.  You can see the red dot shows how much of the panto row that I need to stitch.   I used to lay rulers out along the length of the panto, but this is much simpler.  I sew normally from right to left and when I hit the clamp I then sew towards the left until I can rejoin the the line and continue sewing the pattern.


Here is what the end result looks like at the bottom of the quilt.  A very easy way to end the panto, and uses up the least amount of batting and backing possible.


Sunday, June 15, 2014

Introducing...... Quarter Sections

I am very excited to share the latest pattern from Highway 10 Designs.

The idea for this pattern came from two main sources - requests from our quilter friends to come up with a pattern to use up the Fat Quarter stash they have accumulated over the years and an interest in the Fibonacci Sequence (yes a little bit of a math geek here.)  Kind of an odd combination but we are thrilled with the end result.


We designed this pattern to make really good use of your Fat Quarters. (From a standard fat quarter you aren't left with much more than one 3 1/2" square!)  Easy construction makes this one go together really quickly.  Made entirely of squares it is also great for a beginner as there are no triangle points to cut off!


Quarter Sections is available as a PDF download in our Etsy and Craftsy shops and includes Baby, Lap, Twin, Double, Queen & King sizes. Paper copies will be available soon.


Now, I always love to hear some of the stories behind the scenes..... Naming a quilt seems to be one of the most difficult parts of the process for us.  When we had a look at the finished top we we reminded of the bird's eye view of the Canadian Prairies. 


We tossed around many a name, but "Quarter Sections" just seemed to fit. (For our readers from afar who aren't making the connection, you can check out information on our land survey system here.) 

Normally when Kathy and I publish a pattern we leave the photography in her capable hands - she has a gift and enjoys it as your can see everyday on her blog.  This time out we decided that my geographical area was the right back drop, so I said I would give it my best shot.

It took more than a few than a few tries to get it right. Here are some of the highlights.  First time out I was alone, but found a location I thought would work.  Wind wasn't really cooperating but I thought I would take a few shots and get some feedback from Kathy.  


With advice on a better angle to try, blue skies and my wonderful husband along I thought attempt number two would be a piece of cake - not quite.


The weather was not cooperating for days and days so I was beginning to think that would be the best I would do. But then on Friday there was a calm before the next storm, so I headed off alone again, hoping for the best.  The dust from each passing truck took a long time to settle.


But, finally the shot I was searching for!


I think it all turned out okay in the end, but I will be happy to leave the photography up to Kathy next time.  Check out what she has to say about our latest pattern here.

If you would like to see our designs at your local quilt store wholesale inquiries are welcome through email: highway10designs@mymts.net.


Saturday, June 14, 2014

A new to me notion - fork pins


I had a very productive day at the meeting of the Nimble Thimbles guild in Gilbert Plains.  This guild meets twice a month for a day of quilting and visiting.  I attend when I can, and I have been taking my "Yellowstone inspired" quilt to work on.  I am happy to report that I have all 99 blocks pieced!I also got a chance to start putting rows together.


One of the great things about being part of a guild are the things you learn from other quilters.  A month or so ago, a couple of the ladies were watching me work on these blocks and asked if I had ever used fork pins to assist in the matching of all the points.  I had no idea what they were, and no one had any along that day so the discussion kind of stopped there .  The next time we met, Gail gave me this sweet needle book when I walked through the door.


Inside were some fork pins for me to try.


 Eleanor had been out of town to a quilt store and picked up an extra box with me in mind.

So here are two blocks ready to be pieced together an there are two point of the light blue that I want to make sure line up just right.


I always start by placing a pin in the seam right through the two spots that I want to exactly match.


Normally I would have taken a couple more pins and pinned on either side of the seam.  But enter the fork pin.... One prong on each side of the seam all in one step.  Very secure too I might add.  I would then remove my first pin.


I repeated this for the other point, again removing the first pin before I took it to the sewing machine.


And a great final result.


Nothing shifted at the sewing machine resulting in a match that I am willing to show you this close up!  Thanks Gail and Eleanor for introducing me to a new notion that I had no idea even existed.


On a note so positive note, we are dealing with an infestation of Forest Tent Caterpillars in our area.  They are EVERYWHERE!  


This is one tiny leaf.  Sometimes the whole tree is covered in this density. And they hang down off building and tree limbs.  My daughters have not been enjoying their walk to school as trying to avoid them is almost impossible.


This is a view of the trees in our Cul-de-sac.  It is so sad to see them defoliated.  The leaves should come back in a month, or so.  I just can't wait for these critters to move on!