Wednesday, January 15, 2014

Stars for Kendra

I am going to do things a little differently today.  I will show you the back first.  The was a super-sized snow dyed mandala that I made to coordinate with the quilt top.

And now the front.  This was an old UFO dating back to 2010.  The pattern is called "Stars for Audrey".  This was made for my youngest daughter Kendra, and if you have met her, you know these bold colors suit her.


 These two pictures probably show the most accurate colors of the fabric, although you really can't see the quilting.  The border fabric and the squares were a commercial batik and the rest are my hand dyes.  I ordered the batik online and the colors were not was I was expecting, so I decided to make it work and dye some fabric that did match.


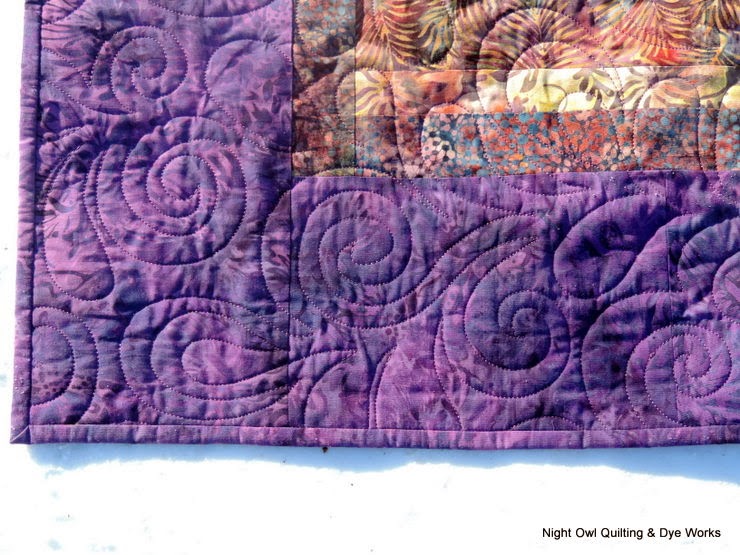
This one had sat un-quilted for a longtime.  I knew I wanted to custom quilt it and match the thread to the fabrics, but I was stumped for the longest time on how to approach it.  When I let go of the idea of filling all the purple the same way the ideas started to flow.  Since the "client" is around everyday she offered some very strong opinions of her likes and dislikes as I was doodling, and that really helped settle the ideas.  She really wanted the feathers and crosshatching.


 A slightly different treatment for the yellow stars and the pink.
 

And a linear border design to compliment its unique shape.

One thing I was concerned about was getting the backing star centered to the front of the quilt.  I am very pleased with how well that worked out.  I was also a little concerned that the quilting would not be pleasing over the snow dyed back, but I didn't need to worry over that either.  Kendra thinks she may reverse and use it both ways from time to time.


Monday, January 13, 2014

Peekaboo Quilt

 Reneta made this really fun "Peekaboo" baby quilt.

 
Behind each set of flaps is a fussy cut square with a different animal.  I was with Reneta at a guild sewing day when she was working on this quilt and I was teasing her about what a pain all those flaps were going to be for her quilter! Actually, they weren't too bad at all.  They stayed in place as I quilted around them, and then a few pins got them out of the way to quilt underneath them.


Reneta added a plain rectangle of fabric in the border so that we could personalize it with the baby's name.
 

A shot of the cheerful backing.  I love the pieced in stripe of border fabric.  Really adds some interest.  We used the Dream Puff batting to keep it really light and cuddly.


We enjoyed some milder winter weather over the weekend and thought we should take advantage of it with a family ice fishing afternoon.  Kendra had the catch of the day with this 65 cm pickerel.  She was in the tent with Kyla getting a hot dog ready when we heard some commotion.  Then it was "Dad, hold my hot dog, there's a fish."  She pulled it up and then let dad measure and take it from there. (Unfortunately all fish between 45 cm and 70 cm must be released on Dauphin Lake so there was no fish supper for us.)


Thursday, January 9, 2014

Winter Star Mug Mats


I am happy to have something to share! We had a wonderful holiday season, but it is nice to get back to a regular routine!  Our guild is having our holiday celebration this week and one of the items we are to bring is a mug rug for an exchange.  I was struggling to find an inspiration until Karen who blogs at Sew Karen-ly Created shared this Winter Star Mug Mat.  She is offering her pattern for FREE on the Craftsy site.  It came at the perfect time.  I decided to make one for the exchange and one for myself.

The pattern has great instructions - it is paper pieced with an applique center.
When it came time for the quilting, I wasn't sure if I was going do these little items on my Janome (it has been a while since I did that), or if I should do them on the long arm.  The longarm was empty, so even though it seemed a little bit like overkill, I decided on the Innova.


A little ditching, some tiny stipples and a free hand spiral and before I knew it they were done.  It is a little hard to see in the pictures below, but I had a little indecision with the grey Magnifico threads I was using so I tried two different ones.


I am really pleased with how they turned out.  Thanks for sharing your lovely pattern Karen!


Tuesday, December 24, 2013

Merry Christmas


I have a couple of projects to share that I finished over the last week.  I completed this "Starry Night" Stonehenge Kit.  The kit came with everything - the tree panel, backing & binding fabric, batting, Swarovski crystals and battery operated LED lights. It is a really quick project.  After quilting, I made small buttonholes according to the light placement diagram and glued on the crystals.


You can see I added a small pocket to hold the battery pack, and a rod pocket out of the extra fabric on the panel.


It adds a nice festive glow in our hallway.  The only criticism I have is that with all the wires on the back it doesn't hang quite as nice and flat as I would like.  Nolan cut a thicker than normal hanging rod which helps a little.  It isn't perfect, but I can live with it.


I had won these four half yards of blue and yellow batiks (on left)  from Sew Sisters Quilt Shop back in the spring on their In my Sewing Room Blog (they host lots of giveaways) and I finally found the perfect project for them.  I found two coordinating batiks from my stash so that I could make a gift for a special quilting friend and one for me!


I saw this awesome sewing machine apron pattern on Craftsy and thought it was the perfect thing for all the UFO days and retreats we go to.  I think the detachable thread catcher was what really sold me on the pattern.

The gift.

One for me.


Now before I go and spend some quality time in the kitchen with the girls creating our traditional Christmas Eve appetizer feast, I want to take a moment to wish everyone a very Merry Christmas! Hope your holiday is happy and warm!

Lori


Monday, December 16, 2013

Not Your Mother's Rail Fence #2


Here is a look at a "Not Your Mother's Rail Fence" quilt that I just completed for Fabriculous - a great (semi) local quilt store. Wendy at Fabriculous has just expanded her offerings to include more batiks (yeah!) and we thought this Highway 10 Designs pattern would be the perfect way to celebrate them.


The quilt is batik front and back.  I used a shiny plum Magnifico thread on the top, and a new panto called "Tickle Too".  I think it is going to become a fast favorite!


 As I was out photographing this quilt I noticed the rabbit highway in our back yard going from our RV to the garden.


Friday, December 13, 2013

Real Studio Tour - Storage Solutions

Today marks week two of the REAL Studio Tour hosted by Vicki Welsh of Field Trips in Fiber.  Today we are asked to share some of our best storage solutions.  My favorite thing is shallow drawers.

I will be the first to admit that I am kind of spoiled when it comes to getting custom built items in my sewing area.  This cutting table was made just for me by my dear hubby.  It was constructed when I had a really tiny sewing spot and made to be expandable and movable.


 It has two wings that open up to almost 8', which is great for cutting out large pattern pieces for garment sewing.  It also contains these great drawers which keep most of my notions organized and easily accessible.


 These powder coated steel toolbox trays are available from Lee Valley tools. I also have some in my sewing machine table.


I also have this custom build that houses a little bit of everything. Those blue trays used to store VHS tapes and were destined for the landfill when things went digital. They became drawers that I used to store projects and my smaller fabric pieces. I try to keep things organized by color and in a single layer to make it easier to see what I have.  The re-purposing works wonderfully for me!


 I find things are more likely to get put back where they belong if they are in a drawers rather than a container with a lid.  I love having my thread out of the dust and the light as well, so this dresser drawer works great to house a portion of my longarm thread.


Thanks for stopping by and don't forget to check out what everyone else is sharing on the REAL Studio tour.
The REAL Studio Tour